Viewing entries in
Recipe

Infused Water III - Watermelon and Thai Basil

Infused Water III - Watermelon and Thai Basil

Watermelon

The days here in Vienna were really hot over the weekend, 33°C and no breeze, and the only way to survive seemed to be in the shade with lots of water to keep us happy. Having friends over for a swim if you are fortunate to have a pool is the best of fun. Julian did that and everyone was having a great time. 
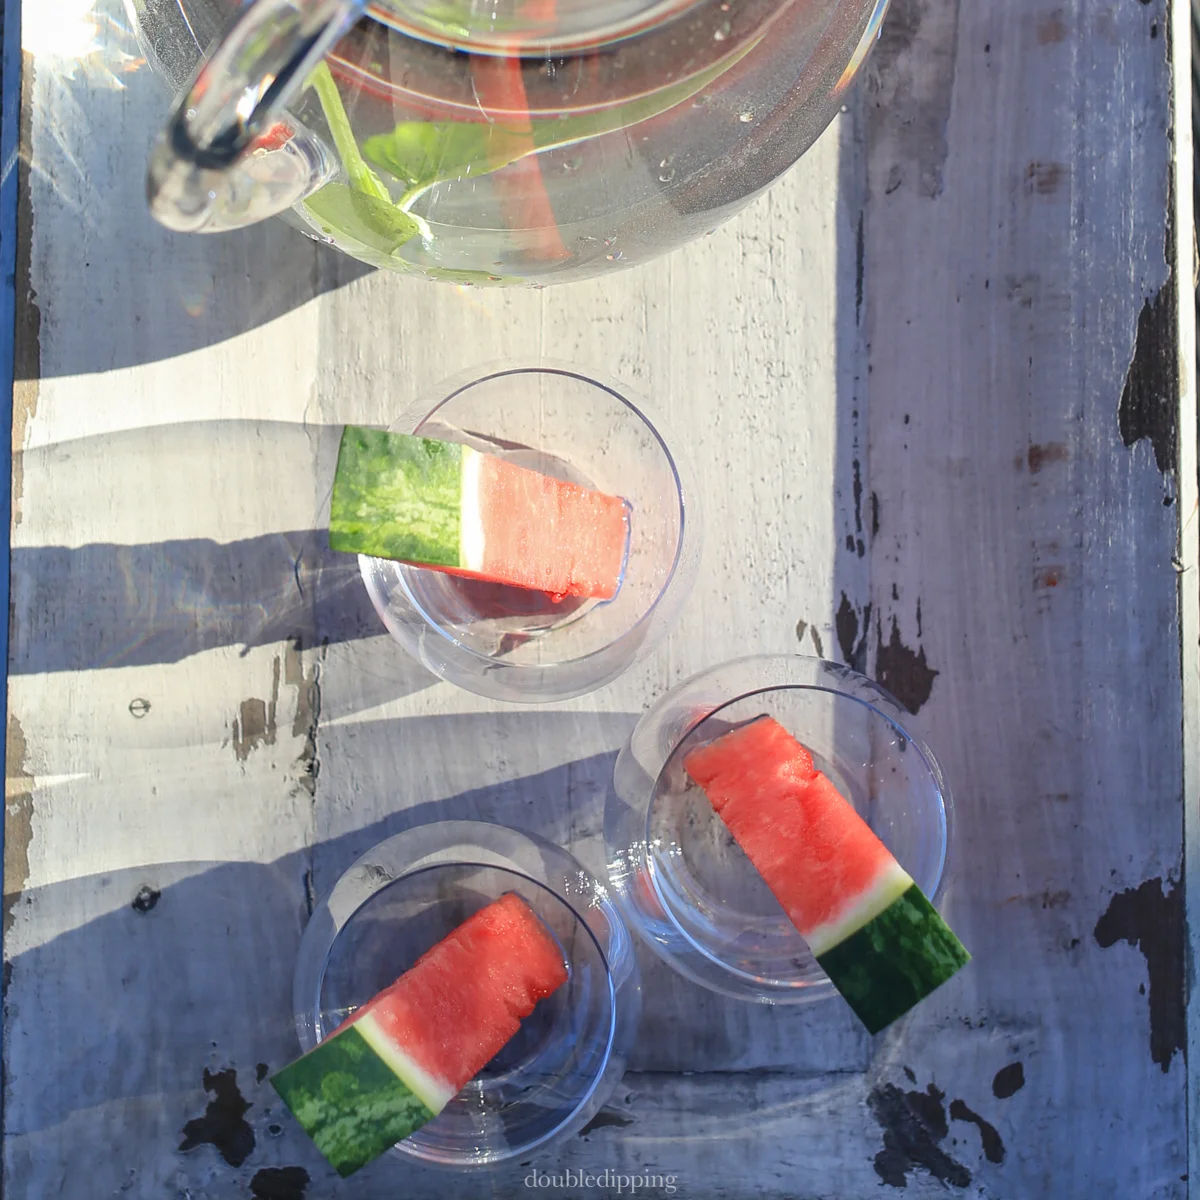
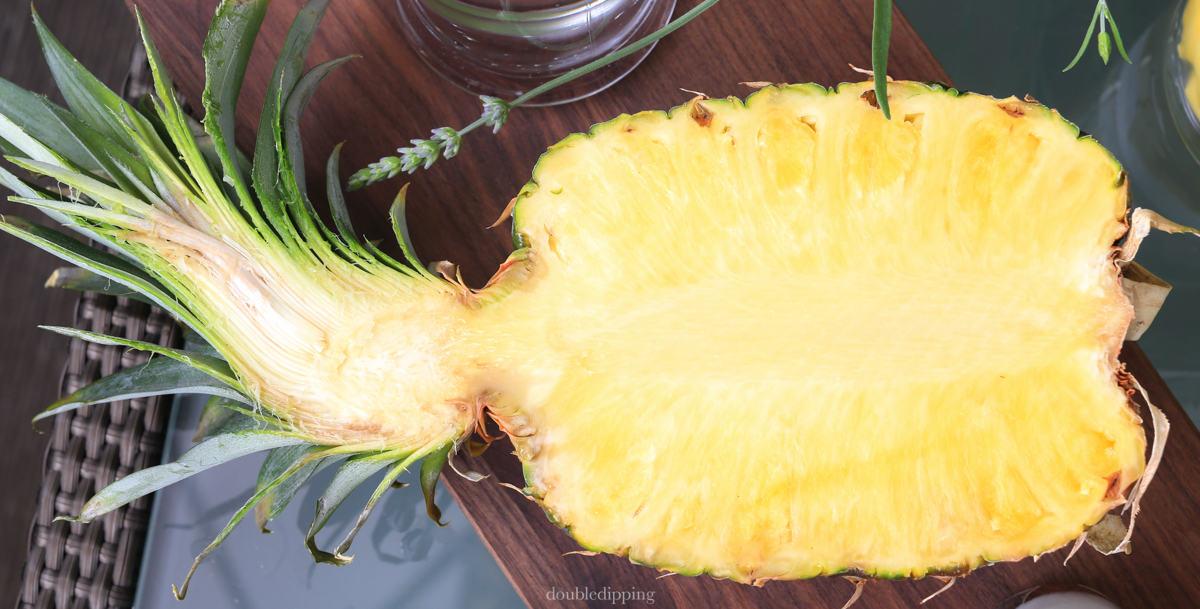
Watermelon is the essence of summer for me. There is something about it that brings fun memories, just to look at this giant cannonball with stripes makes you think of childhood days. 
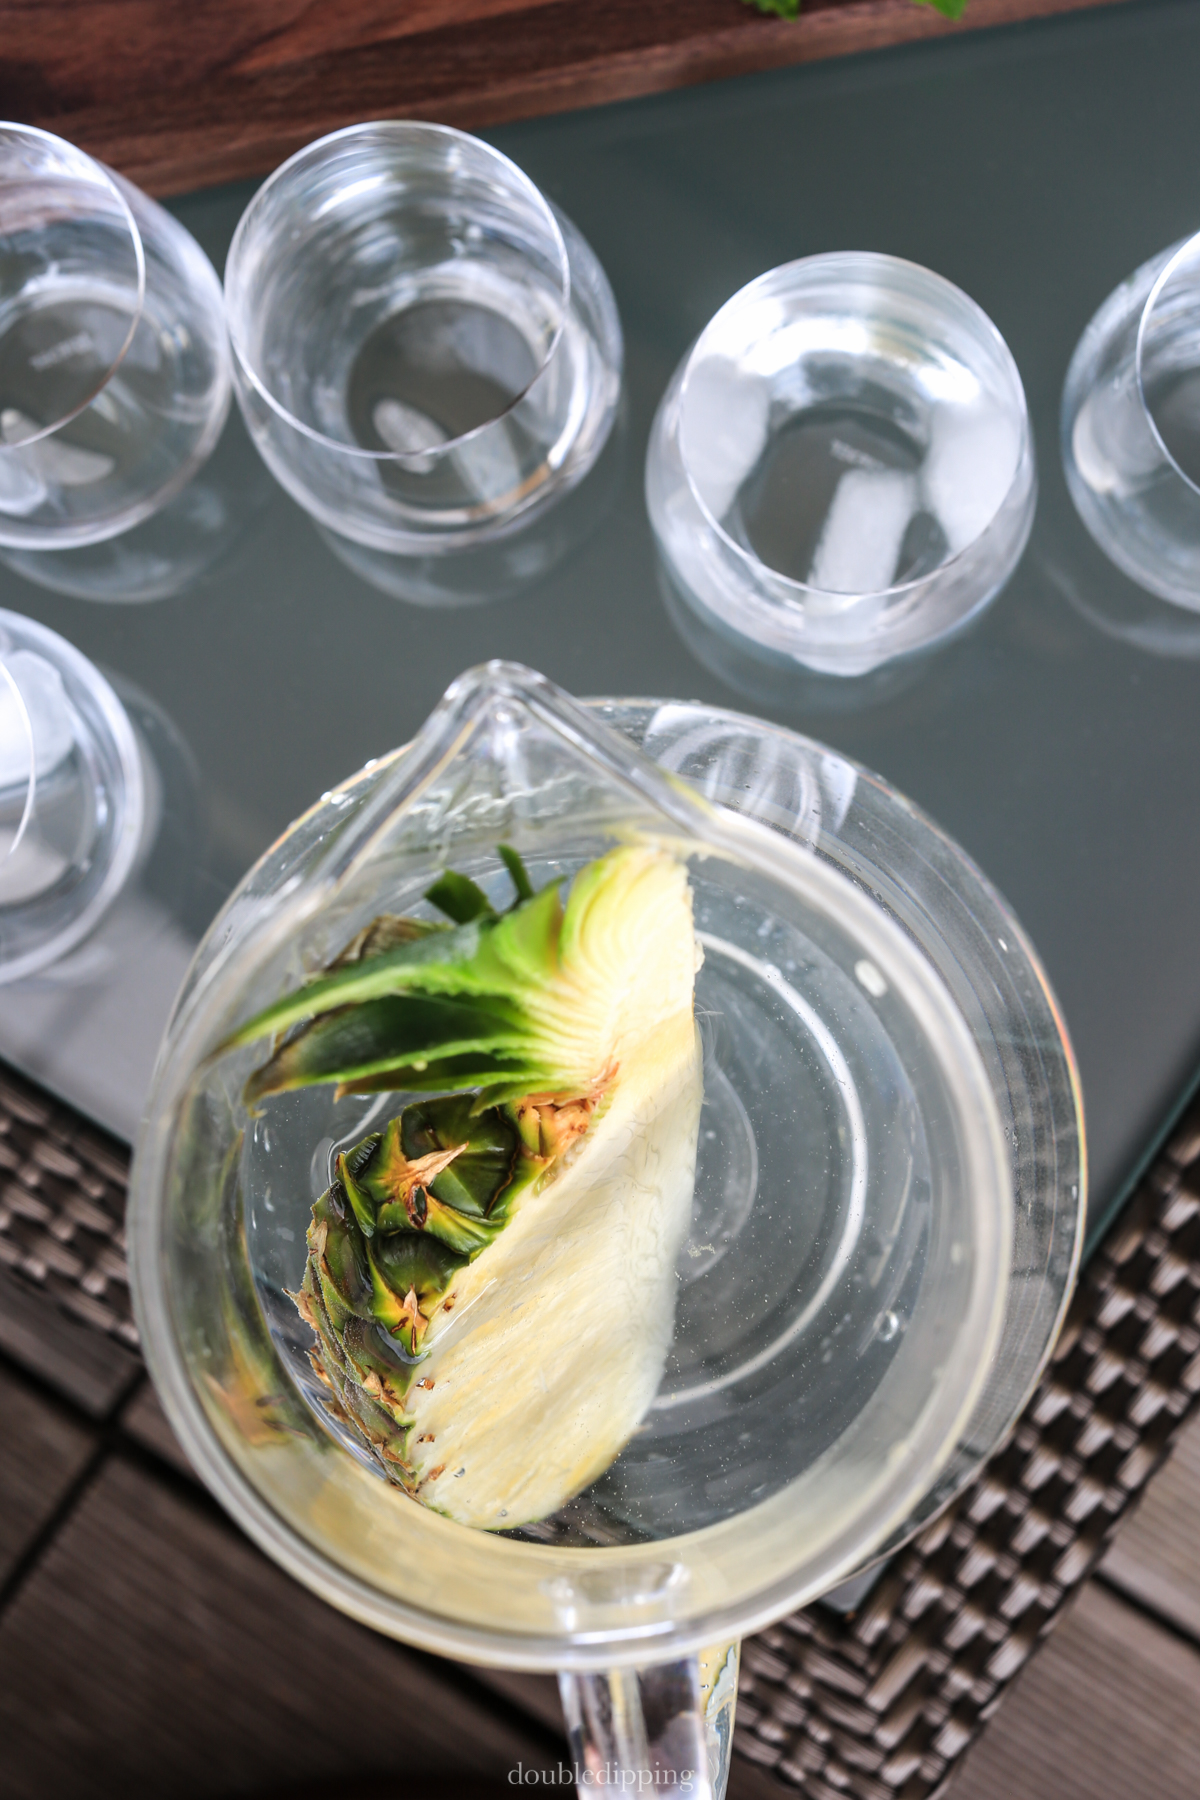
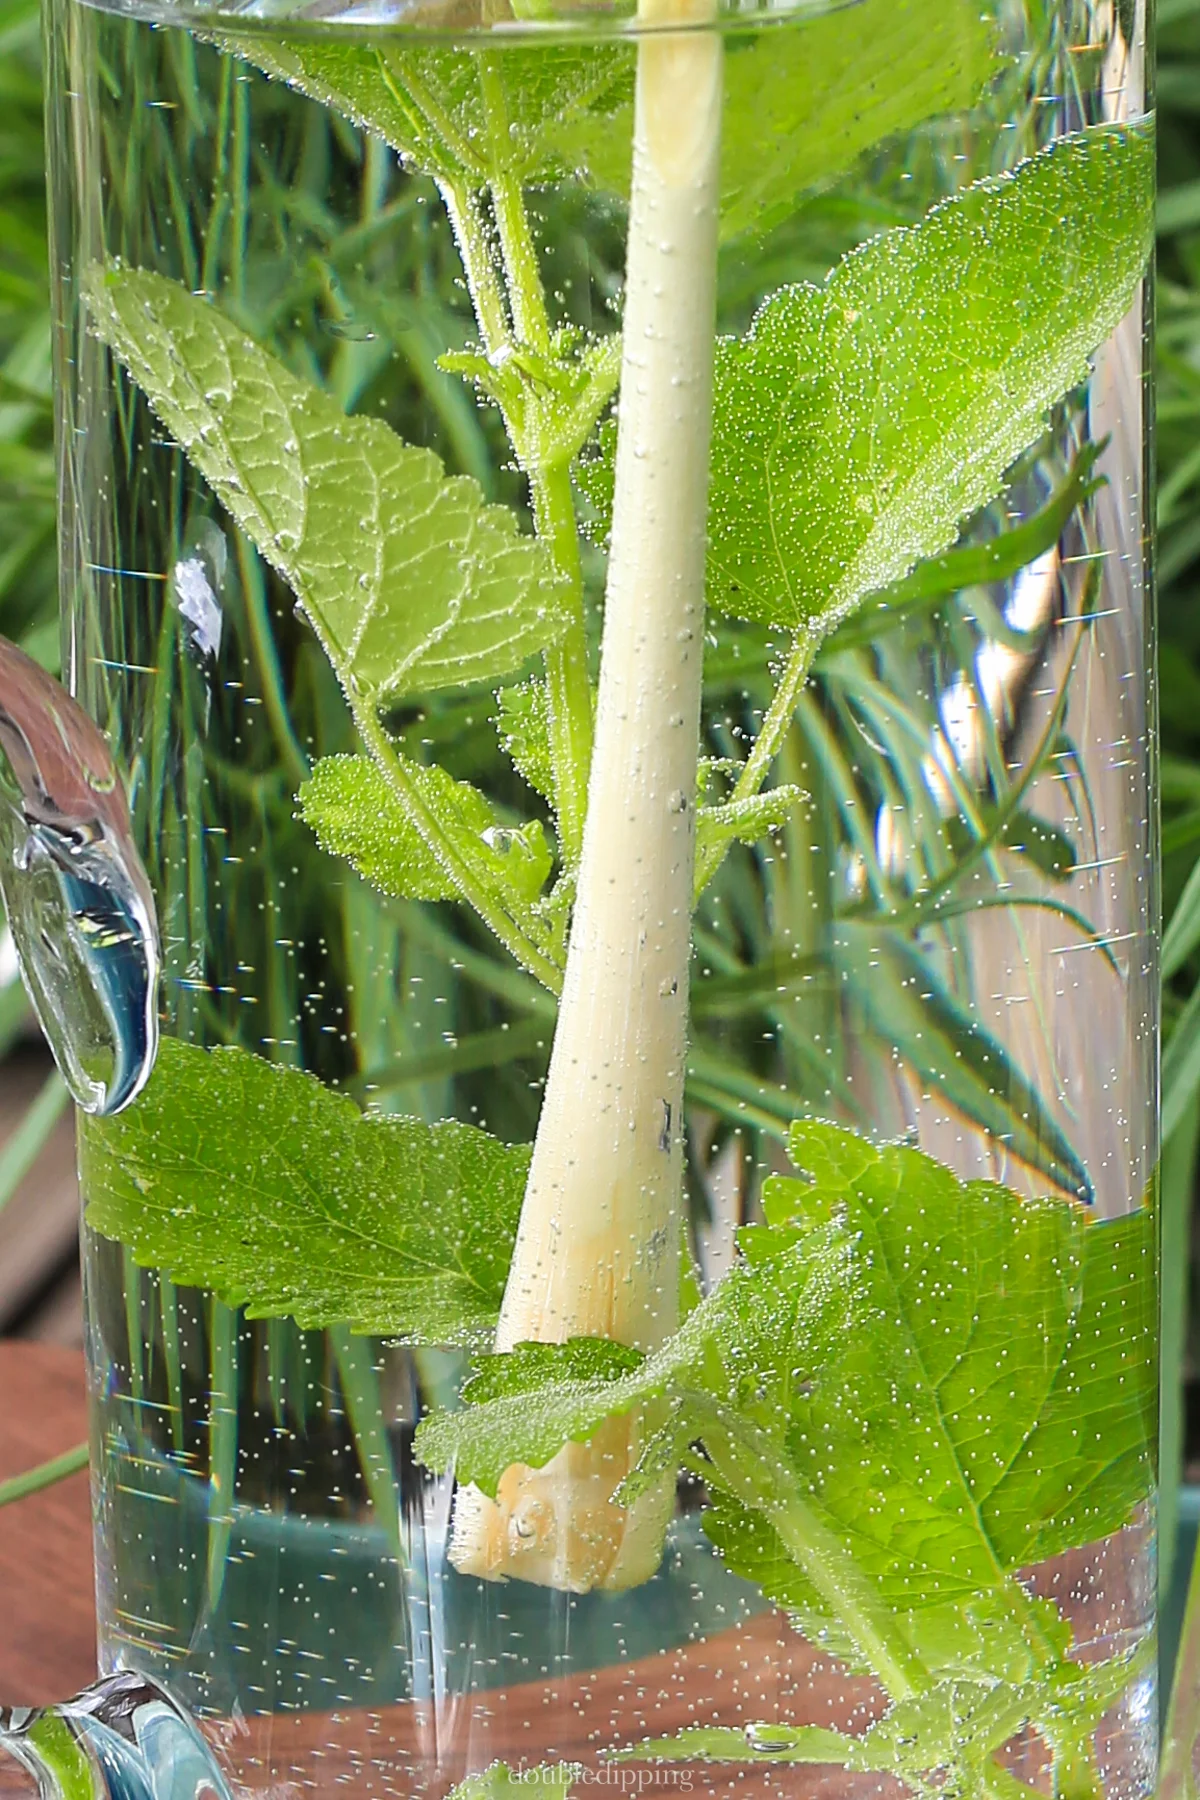
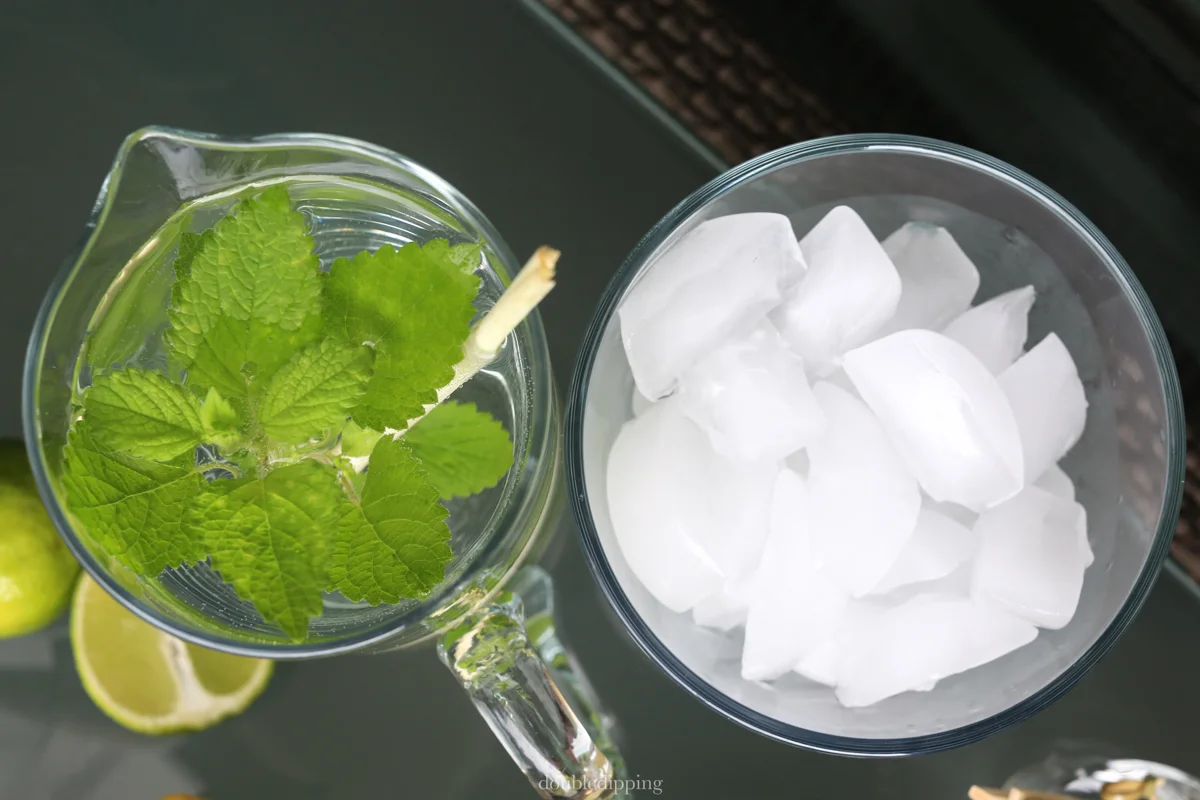
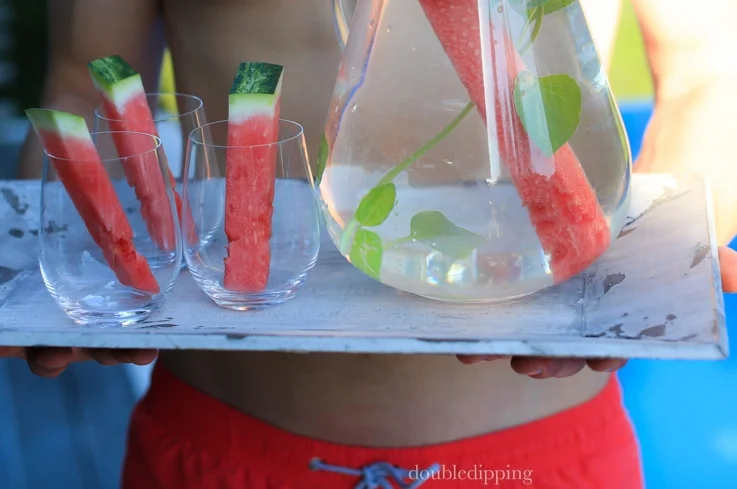
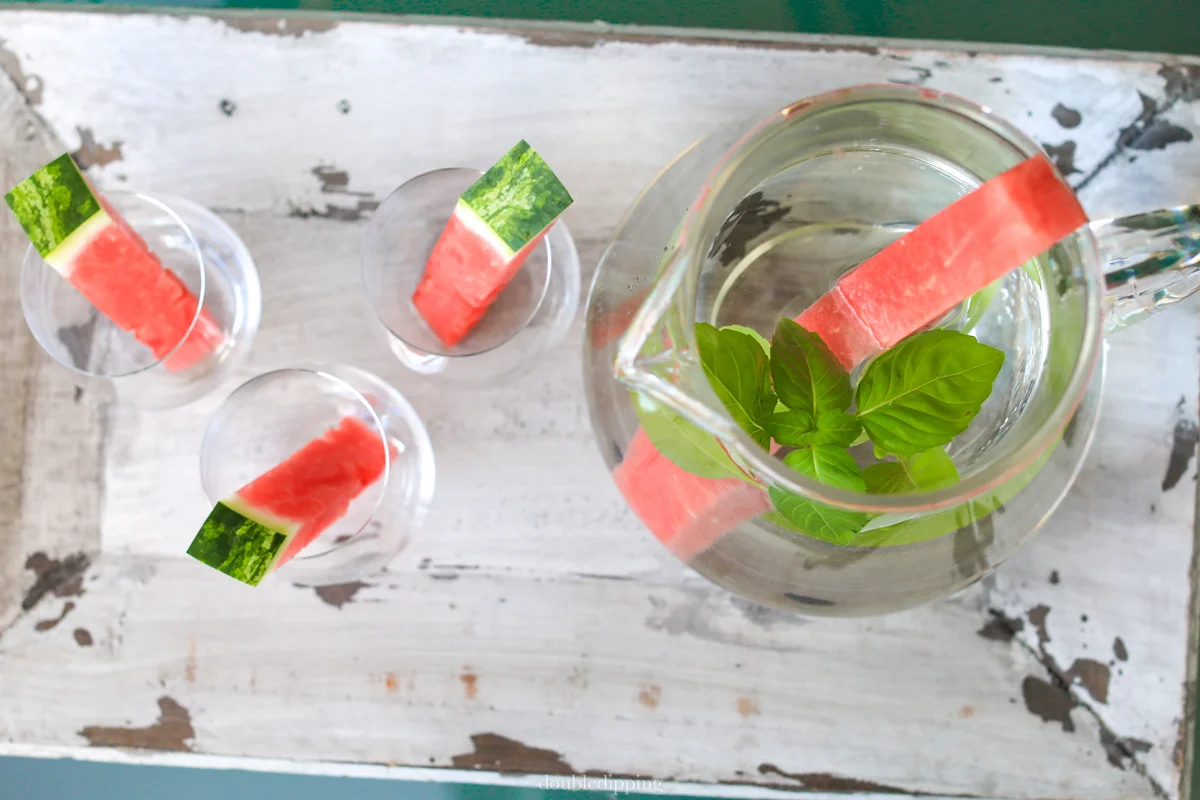
I prepared a jug of water with a long and perfect stick of melon and a sprig of basil. I can imagine, that mint works well as usual with fruit but I thought why not give this one a different look. 

Don't worry if your watermelon has too many seeds, they sink to the bottom and won't bother you. I just happen to have a really big and oval watermelon and used the centre for my infused water.I love the ones with the dark seed much better, they seem to have way more taste. plus what is a fruit without seeds? Genetically manipulated. The farmer is forced to buy new seeds each year because the ones he grows will not provide for the next year's crop.

Here to seedful fruits ! Cheers !

Watermelon
Watermelon at the pool
watermelon to drink

Quinoa Salad with Eggplant and Lemon

Quinoa Salad with Eggplant and Lemon

Quinoa Salad
preserved lemon
Quinoa salad
Quinoa and lemon

I have been impatiently waiting for my lemons to preserve and I used the ones from the Steirereck to make this salad for a bigger gathering. This is my kind of salad I could dig in and finish the whole bowl! Oh so yummy and healthy. what is there to know about quinoa:


Quinoa is a rich source of the B vitamins thiamine, riboflavin, vitamin B6 and is a rich source of the dietary minerals iron, magnesium, phosphorus, and zinc. Quinoa is also a good source of the B vitamins niacin and pantothenic acid, vitamin E, and the dietary mineral potassium. The pseudo cereal contains a modest amount of calcium, and thus is useful for vegans and those who are lactose intolerant. It is gluten-free and considered easy to digest.

All those reasons to eat quinoa ! And stay healthy ! That is the best part !

Print recipe

reparation time: 40 min
Cooking time: 25 min

recipe for quinoa salad

You Need:

200 g quinoa
1 large eggplant cut in dices
1 elephant garlic, cut in small pieces
olive oil
4 green asparagus | or 1 cucumber
1 yellow bell pepper
2 sprigs with approx. 12 leaves of Thai basil
    - alternatively use ½ cup cilantro or parsley
½ cup organic olive oil
½ preserved lemon from the jar + a bit from the salty juice
chili

Cook the quinoas as directed on the package, make sure they are not to hard, just right, which is different for everyone. Let cool. You can easily cook the quinoa a day a head; it keeps well in the fridge.

The eggplant will be fried in plenty of olive oil over medium to high heat in a pan, add the garlic when halfway done and stir frequently, the eggplants should turn light brown and become quite soft. Let them cool.
In the meantime chop the asparagus for decoration, leave the pretty heads aside, and cut the bell pepper as desired. Chop the herbs and mix them together with the eggplant under the cooled quinoa. In a bowl make the dressing with olive oil, lemon and chili and stir well. 

Pour the fragrant dressing over the quinoa, mix well so the juices can combine with the grains and decorate with the bell pepper and asparagus. 


Infused Water II - Pineapple

Infused Water II - Pineapple

pineapple

So simple and so delicious! A floating slice of pineapple and the summer feelings are near. Add some lemon juice and mint leaves. These ingredients cool the body and help to get through a hot summer day without sweating too much.
When I offered this drink to new friend who happened to come by this morning, he offered in return he would be my hand model and pour the drink while I shoot the photo. Great new friend!

 Thanks, this is refreshing!

Pineapple in water

Infused Water I - Lemongrass and Lemon Balm

Infused Water I - Lemongrass and Lemon Balm

Lemongrass and lemon balm

It has been really hot today and the first thing that comes to mind is that summer is right here and as the temperatures are climbing we must drink more as usual. The best way to stay healthy and hydrated is to drink between meal times and plenty of water is the best. Ignore the sodas and the sugary drinks, sometimes those tasty waters hide a ton of sugar in them and the calorie intake along with the unwanted hunger attacks after 20 minutes are unreal. 

Not so with these waters made by you, tasty and really pretty, your hydration plan gets an upgrade, your mood swings to green and you will get inspired to come up with your own creative ideas on how to prep your jug of water.

I must add that we are fortunate here in Vienna with the best quality tap water of the planet for a city with almost 2 million inhabitants. More than 150 years ago smart engineers built a water pipeline from the mountains into Vienna with fresh water. This system is so amazing that no matter how high our buildings are we need no pressure pumps. We open our tabs and the water runs freely. We shower with it and we even use the water to flush our toilettes. Sounds insane for everyone else - yes, we are so blessed with fresh water!

Infused Water

Crack a stalk of lemon grass and wash a sprig of lemon balm that's all you need and a little time outside the fridge. After 2 hours your water is infused and ready to be enjoyed.

All ideas work as well with sparkling water, but I prefer the natural water for this by far. It brings out the taste so beautifully ! Enjoy and feel your beauty inside out.

I have been told by friends that one cannot drink too much water and so they keep a bottle with them everywhere they go but that is not true. Essential minerals can be washed out by excessive drinking as well and that can weaken a body. The rule with almost everything in life is moderation. 2 liters of water are perfect for your body and will keep you hydrated well unless yo spend your days in a dessert under a scorching sun. Your body counts fruit, vegetables and soups as liquid as well.

Melon Shooter

Melon Shooter

Right now when I am looking outside I kind of feel like cheating on you since the photos really look like summer and warm weather and all I could hear for a day was rain outside my window. Tiny drops and heavy ones and the background constant sound the water from heaven makes all aroud me. But the summer months are ahead as I said I will for sure keep the closet free from coats and knits ... maybe not today but one doesn't want to catch a cold either?

I am trying to think positive and with this recipe you might want to join me in thinking of lazy evenings, friends around and a light meal to give plenty of room for a good conscience about what we ate  and lots of energy for a good dance later on. Leave away heavy make up that belongs to the past months, now we want to feel good about the sunshiny days ahead and feel healthy. This recipe again is very healthy and the easiest to make, no cooking no washing up, the best to prepare for guests in advance or keep in the fridge for everyone in the family to grab as a healthy snack any time of day. The best way to start a meal is with something fruity and fresh. Your stomach will say Thank You and you are prepared for an easy transition between no food and dinner. This is a way of helping your skin glow and you will feel much better if you make the most of all the fresh produce there is to buy now on the markets. Now is the time for great fruit and vegetables and the time for pre-packaged stuff is gone.


Melon Shooter
Edamame With Soup

This is Edamame, our favorite for snacks. Simple soybeans in a shell cooked and sprinkled with sea salt and grated horse radish. It is easily prepared and makes the best pre dinner munch.
I found my new favorite flower shop! I am so excited, it has been there for a while but I kind of never realized how awesome it is. I will have to show you pretty soon some pics and you will for sure fall in love it. It is so close to my home and they have the most beautiful flowers and make fabulous arrangements! These peonies are from the shop, parents they gorgeous? Come and check out Unverblümt! I know you agree! I am so lucky to live in such a great neighborhood!

Peonies

Print recipe

Preparation time 15 min
Chilling time 3 hours

You Need

1 melon, I use a cantaloupe or a honeydew melon
1 organic lime, grated peel and juice
½ tablespoon curry powder or paste
200ml | 2/3 cup sparkling water

salt

When you read the recipe you could probably make that soup with out any help but here is what I did.
The lime must be washed and dried prior using, then you can first grate the green peel and the press the juices from it. We need the entire flesh from the melon so you can either cut the melon lengthwise or in half, scrape the seeds out and cut the remove the peel. If you have a ripe fruit then this is really easy, you could scrape the flesh out with a spoon, this way you don’t even need a knife. Put this in a blender, I used my brand new Kenwood kMix, add the lime juice and peel, curry, sparkling water and season to taste with salt. Done. Now transfer the soup to your fridge for at least 3 hours.

I decorated my glasses with tiny basil cress.
Very decorative can be a fresh slice of lemon, herbs or even a small stalk of celery. This way the whole thing stays vegan, without anyone missing flavor or you can add a piece of crisp Serrano ham. That would make my son truly happy.  

Moroccan Preserved Lemons

Moroccan Preserved Lemons

LEMONS

I once visited Da Paolino a restaurant in Capri, an island in Italy, where you sit under lemon trees and each dish is made with fresh lemon juice, and they serve the best limoncello in Italy! My recipe for today is entirely different we travel further south to Morocco and the lemons are preserved by a fair amount of salt, that will keep them for up to a year fresh and yummy. Get hooked with me on :

Lemons !

moroccan lemons

When I open my window I can hear a trillion birds singing and I have finally put away my coats and boots. If it gets cold I will ignore it and by reading tons of Moroccan recipes,this weekend I decided that the most important ingredient of a summer full of oriental bliss and spices I will make those fermented lemons, almost no recipe can do without! I read that they need at least one month to become what they should and then can be used up to one year. So next thing we should do is run to the market and get a huge bag of organic lemons.

You and I will most likely never be able to live without them and if it is lamb, chicken or couscous , salad or vegetables, we will add a bit of those lemons to it, even the juice can be used!

Until yesterday thought one cannot buy Moroccan lemons in Vienna, when after an absolulty inspiring dinner at the Steirereck we chatted with Heinz Reitbauer and I told him about my new found love to this recipe he said: we make them here and you can even buy them in our shop! Heinz makes them with in Vienna grown lemons from the Orangerie in Schönbrunn! Then he gave me this jar to proof! How cool is that? Not only is Heinz an expert in almost everything that can be eaten, he stunned his colleagues once at a convention in Spain of all places, with his so well received dried lemons and oranges he serves at the Steirereck from a beautiful cart rolled to your table at the end of a meal. That said even if you can buy them it is so easy and fun to make your own and invest those 10 minutes per jar and live off a delight and fullness of flavor crossing bridges and traveling continents on your plate and with your guests.

Most important is a large enough empty jar with a tight lid, as well as smaller ones to give away as presents, rinsed once with boiling water to disinfect and then you are good to go!

lemons in jars
lemons in jars

You Need

preserved lemons

2 kilograms organic lemons, ripe, bright yellow skin
2/3 cup sea salt, can be more
juice from 4 lemons
hot water

Alternatively
bay leave
coriander seeds
garlic
red pepper

Soak the lemons in cold water , rinse them and dry them with a paper towel. Cut off that end, where the lemon once grew on the tree, and make a cross cut through the lemon so the fruit will not be separated but can be opened up like a 4-petal flower. Open the lemon with one hand and season with one teaspoon of salt. Do that with all of the prepared lemons. Then place them one by one in the jar, add 1/2 a teaspoon of salt after each layer. Press them hard into the jar so the lemons give some juice off. Finish under the brim, share the lemon juice evenly among your jars and after the last spoonful of salt add the hot water!
Now you can experiment with additional flavors such as a bay leaf or seeds; I am a purist so I made mine without additions. Close the lid and give them lots of time in a dark place at room temperature. You can turn the jar upside down every three days but I suspect if you forget it won't ruin your efforts! After one month you can open up your first jar of preserved lemons and use them for your recipes. The opened jar keeps in the fridge for up to one month.

You should be smelling this !!!! This is unbelievably breathtaking, an explosions of lemon fragrance !!! WOW I AM ADDICTED! What a flavor ! Cant wait to use this ! This is the preserved lemon by Steirereck ! Just awesome!

Don't pour away the lemon water, it is full of delicious taste and can be used on salads and in soups or any kind of marinade. It is absolutely fine when it becomes jelly-like!

NOTE

The peel is used and the flesh discarded, not like usual, just the opposite! Sliced thinly or chopped to small pieces. Heinz recommended to use the entire fruit, here you go! Please give it a try and tell me how you did!
 

Cilantro Salsa

Cilantro Salsa

Cilantro Salsa
Kenwood kmix

Today I received a beautiful package with a great gift from KENWOOD. 
I had an eleven year old magic wand and now I own this stylish appliance in black with all the additional tools, the full set which will help me make the best stuff ever, work efficient and be creative! 
Thank you KENWOOD for giving me extra power!

Thank you Magdalena and Katharina from Network PR to make this possible !

Cilantro or coriander is widely known as a typical herb of the Asian cuisine but in truth it can be found in southern Europe and northern Africa. The Chinese parsley as it can be called as well is rich in Vitamin A 134% and Vitamin C 45% and gives each dish a distinct taste. Cilantro is best if used fresh sprinkled over a dish or added uncooked in a salsa like this one inspired by KIM.

Kim is an energetic Korean chef married to an Austrian and her food is outstandingly innovative, for example she combines traditional Korean dishes with Austrian Grammeln ( fat pork crumbs), yes! But her food is like medicine and to pay tribute to her origins she spends months in Korea hosting a very popular TV cooking show. 

For some tongues cilantro is a no go because of its soap-like taste. But I recommend to never blend cilantro or cook it in your food rather use it fresh sprinkled over your dishes last minute.

This salsa goes with almost everything and can be eaten quickly with a piece of bread or cracker.

Print the recipe
Makes 300 ml of salsa

Preparation time: 20 min

You Need

large bunch of cilantro, leaves without the stems
2 tsp sesame seeds
½ cup pine nuts (optional)
½ cup olive oil
1 clove garlic (minced is optional
½ cup freshly grated Parmesan
salt to taste
balsamic glaze (the slightly sweet, thickened one)

Cut the cilantro leaves with your knife, do not use the blender) Mix all the other ingredients in a bowl. Refrigerate in an airtight container up to 1 week.

Serve to freshly baked bread, Asian dishes, to grilled fish, use for decoration on hors d’oeuvres, to omelets, Tofu, ….

When you serve it in the individual bowl you will put a tablespoon of pesto and drizzle balsamic glaze around in a semicircle.

Vegan Vietnamese Springrolls

Vegan Vietnamese Springrolls

Vietnamese Springrolls

This Thursday was the most gorgeous day of the year so far, here in Vienna. The sun was set in a soft blue sky without any clouds, the fresh green on the leaves was so bright and promising. The sun came through the leaves and the play of shadows and lights was mesmerizing.
I am still in STREET FOOD mode and things I can eat with my hands, so I did some research, ventured through all my cook books and found incredible good recipes. To make it my own I wanted to make it pure vegan and here is my version of a healthy - easy - everyone can do it - recipe with only a few ingredients which won't leave you desperate when you go shopping for them.

These are some of the ingredients you need. See how easy it is to roll them. To be honest I don't make them that often and I am pretty slow at rolling my spring rolls. One of my cookbooks tells the story behind their famous spring rolls noting they sell 80 000 rolls a year and they are rolled mainly by one single woman ...

The biggest mistake you can make is leave the rice paper too long in the water and it tears, leave it too short and it won't bend and break. Keep a wet cloth underneath is much better than rolling them on the work surface, the cloth prevents the paper from slipping and absorbs the water best.

Keep a bowl of warm water in front of your tea towel, the instruction on the package said cold water, but that doesn't work. Wet one sheet at the time until it becomes slippery and soft approx. 3 minutes and carefully lift it out. By the time you get more experienced you can wet the next sheet while you roll the first one. 

Place the vermicelli (only as much as fits in the palm of your hand), carrots, onions, cilantro and sugar peas, on the lower part of the paper. Place a mint leave or 3 small ones on the upper part (that is for decoration), fold in both sides to the middle so they touch each other and roll the piece as tight as you can before the paper tears up to the top. That makes them 8-9 cm long.

This way you can be really creative with the mint leaves, they will shine through the final roll of your paper and you can make them look all individual! I decided to take a really big leave as you can see and because I love the taste of mint in this dish.

When you are done rolling them you can take a piece of kitchen paper towel, rinse it and wring it out, put it over the ready plate or spring rolls and wrap it with plastic foil. This way the spring rolls keep soft until you serve them and up to 3 hours. The spring roll does not taste that interesting, the sauce will spice it and give it the right flavors. I recommend to make double the  sauce as it easily keeps in the fridge for days if you do not use it all.

inside a spring roll


Print recipe
Preparation time : 45 min

You need

 Springrolls

12 round sheets of rice paper (200g)
1oo g | 5 cups cooked rice vermicelli
1 cup spring onions in slices
2 cups julienne carrots ( thin slices of carrots)
2 cups of julienne sugar peas, best if cut length wise
12 mint leaves
1 cup cilantro leaves

Dipping sauce: mix all in a bowl

4 tbsp sweet soy sauce
2 tbsp rice vinegar
2 tbsp maple syrup
2 tbsp sesame oil
1 tsp minced garlic
1 tsp grated ginger
1 tsp of lime juice
½ tbsp of fresh chili in small pieces

Certified Red Beet Burger

Certified Red Beet Burger

Vegan Burger

I was eating out quite a bit lately, two times Japanese and somehow the spices and aromas made me crave for something more substantial and down to earth and lets say JUNK FOOD was on my mind and I searched all my new cook books and got really inspired for a big challenge.

 Have you ever been out there alone and tried to accomplish something that almost everyone advices as the hardest in its league? When it comes to food photography Ice-cream, Lasagna and Burgers are the trickiest and yet I had to try it and YESSSSS ! it is .... not a ride in the park.

Why it is a challenge? Because it must look right ! The patty must be shiny the salad crisp and fresh the sauce dripping .... I have only two hands and here comes the impossible. It is all about timing: 

Once the patty is done it must cool, because the salad hates to be hot, the sauce must be dripping the cheese melting the tower may not topple ... you can imagine I guess!

Here is my STREET FOOD I would crave and I wish more recipes would be out there. I tried to make a Burger, that looks like one and yet is 100% Organic, vegan, fresh and yummy. I never eat at fast food restaurants for the simple reason that I don't like the idea of not cooking nor can I imagine that one can actually eat well when the cost is so low. I am still happy that they exist, not everyone is as fortunate as I am and can afford to grab the organic versus the sale item. But once in my life I did and I remember the craving for the fast food so well when I was pregnant with Sophie and my poor husband was forced to get me something I thought I could not survive without. The funny thing is that this craving never came back and when I was pregnant with our son, it was oranges and sour tastes. Totally normal I thought eating 10 oranges a day ...

I admitted already to my broccoli phase and my red beet phase, ... which seems to be prolonged I suppose. Each time we eat out and they offer a veggie Burger, I need to try it and most of the time the patty is so soggy and the taste is off, the vegetable is of a creamy consistence and not my thing. Again this one has passed the test and was devoured by my husband in a minute even though it was already cold. Even the sauce passed my son's critical eye and tongue who still thinks that no meat is not a meal.

The patty and the cocktail sauce I made are entirely vegan and the bun has an egg in it but hopefully one day I will be able to bake one without. The bun is actually a recipe from a cookbook but you can easily find one online or go and buy them in the store. I suppose you don't want to spend a day in the kitchen making yourself a simple BURGER ? If you are interested, I can give you a simple one like the one I used.

Vegan Burger

Print recipe
YOU NEED

Patty

400 grams red beets, peeled and shredded
1 tbsp garlic
100 gr oats, the large type
1 tbsp grated ginger
1/2 avocado, mashed

1 tbsp tamari sauce
salt, I used smoked salt
chili
3 stems basil, cut in small

Cashew Cocktail sauce

2 cups soaked cashews
2 tbsp olive oil

peel and juice of one organic lemon
1 tbsp mustard
2 tbsp white wine vinegar

1 ½ agave syrup
6 tbsp water
½ -1 tsp salt
grey pepper

+
5 tbsp ketchup

1 tbsp Worcester shire sauce

 Additional for assembling

fresh green salad 
yellow bell peers cut in rings
slices of vegan cheese
onions or white cabbage cut in slices

burger buns, self made or bought
Potato chips

The patty is a colorful red something, no name has been invented but please use gloves and an apron, mix it all together and let it rest while you make the sauce and prepare the other steps.

The sauce is made in a powerful blender, I use a blendtec bought at the Cuisinarum on speed 4.

For the sauce:
The cashews can be soaked over night in cold water or for an hour in hot water, that will do the same trick, rinse them and put them in the blender. Add all the other ingredients except the salt and vinegar, the amount depends on weather you like it tasty or rather blend. Taste to your liking. The amount of water the sauce demands can vary a bit so add if you think it is not saucy enough.  A bit of a feel for it and you cannot go wrong. Vegan cooking allows creativity and forgives individual approaches. When you are done with the basic sauce you can use as well for a salad dressing, take 4 heaped tbsp of the cashew cream - save the rest for later - and add the ketchup and the Worcester shire sauce, mix well and set aside.

In a pan heat some olive oil on medium heat, form patties with two spoons or with your hands from the red beet mix. Cook on both sides until slightly brown. Here raw will still be safe and well done is not ruined. That is what meat lovers say when it comes to define the grade of meat cooking. 

Rare – Medium – Ruined

Everything is great !

Cut the burgers in half assemble the burger with what ever you like best, even a slice of vegan cheese.
Mine is a bun - salad - sauce - red beet patty - cabbage - cheese - salad - sauce - bun – Yumm !!!


Easy Brioche

Easy Brioche

Easter Sunday is a traditional feast here in Austria. But with the table set with everything you can imagine, we all are waiting only for this Brioche served hot from the oven by Sophie let alone the smell that tortured us until it is ready it is no wonder that we cannot show you a single piece cut up for you or us eating it. You must understand it is a race of how to get enough for each one of us. Enough of this warm fresh French Brioche. The one behind the lens would be for sure the one going away hungry and unhappy so the desire to take those missing photos is close to zero.  But we share the recipe with you so can stress every one in your own family at Easter Sunday with this treat !

You need 

75 ml | 1/3 cup warm water
1 package | 2 1/4 tbsp active dry yeast ( not quick rising)
325 gr | 2 1/3 cups cake flour
280 gr | 2 cups all purpose flour
75 gr | 1/3 cup granulated sugar
2 1/2 tsp fine sea salt
6 large eggs at room temperature
285 gr | 10 ounces butter at room temperature

The dough must rest overnight in the fridge so please start the evening before you need the Brioche.

The yeast must dissolve in the water for 10 minutes until you can see a little foam..

Sift the flours together in a bowl with the sugar and salt and attache the dough hook to your stand mixer. Set the mixer on low to medium speed and add the eggs one at a time. Beat 1 minute.
Slowly add the dissolved yeast and continue on low speed for 5 minutes. Stop the machine, clear the hook, the dough likes to climb up the hook, beat it another 5 minutes.
Add the butter in cubes in 4 batches beating for a minute after each batch. Now beat the dough another 10 minutes until real soft and smooth.
Transfer the dough into a large floured bowl cover it with plastic wrap and let it double in size somewhere warm and cozy. Best is the oven on lowest heat mine is 30°C. That takes 3 hours.

turn it on a floured work surface and gently fold it several times to let the air out of the dough. Return it to the bowl for the overnight rest in the fridge. Sleep quicker that night ;-)

In the morning before everyone gets up you are back in the kitchen opening the fridge and here it is: your Brioche dough, now ready for the final workout:

Depending on your loaf pan size either use two or one larger one, butter and flour the pan and take the dough out and divide it in equally sized small balls set them next to each other in rows of two and fill the pan with your small dough shapes, 2 centimeters lower than the pan. Let rise in a warm place uncovered until 2 centimeters above the top of the pan. 

Preheat the oven  to 175 °C | 350 °F .

Bake for 45 - 50 minutes and test with a wooden chopstick or skewer if it comes out clean it is done. If you like to freeze the Brioche then wrap it in tin foil freeze it still hot for up to 2 months. I know a nightmare for the freezer .- Heat the oven to 120°C | 250 °F and without thawing first and still wrapped the Brioche can be reheated. that takes 20-25 minutes.

Adapted from Tom Keller ad hoc at home

Brioche